Meta Ads: Creating your first Looker Studio data source to build your custom Dashboard
Build Your Report
Adding and authorising Find My Insight Meta Ads Connector in Google Data Studio.
This guide shows you how to use a Find My Insight Connector for Data Studio, It's pretty simple, just add and then authorize the connector. This will create what is called a Data Source that can be added to your Reports.
1- Go to https://lookerstudio.google.comand log into the Google account you want to use, if needed.
2- Click Start a new report->Blank.

-If you already have a Data Studio report you want to use, you can open that instead and continue the steps.
3- Click on CREATE NEW DATA SOURCE at the bottom of the right-hand "Select Data Source" pane.

- If using an existing report, click Resource->Manage added data sources->ADD A DATA SOURCE instead.
4- Scroll down to the "Partner Connectors" section and look for the Find My Insight Connector you want to use. Alternatively, you can use the search bar at the top. For example, searching for Facebook Ads:
Example search for Facebook Ads Insight in the partner connector list
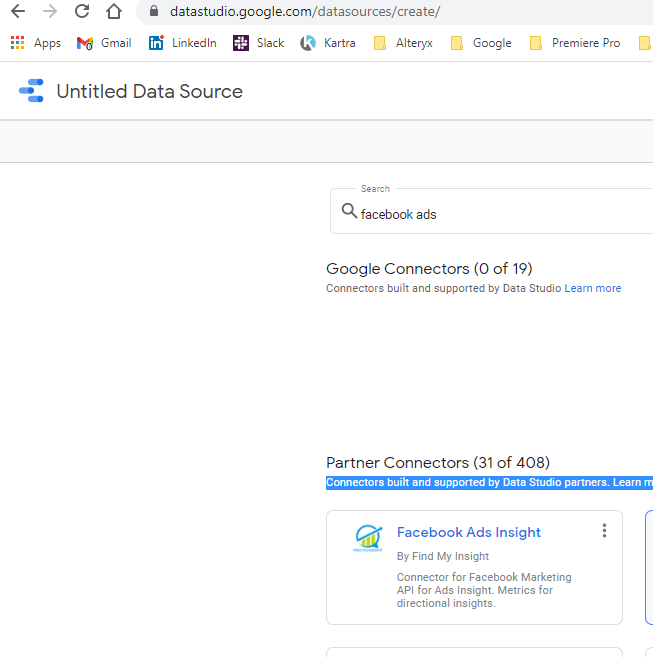
5- Hover over connector and click SELECT to start the process of using that connector.

6- Click the AUTHORIZE button to give permission to the connector to access your Data Studio account.
Orange arrow pointing to first "AUTHORIZE" button to give Data Studio permissions

7- A pop-up will ask you to log in with your Google account - make sure you select the same account you intent to use Data Studio with and then click Allow to accept the access request.

8- Click the SUBMIT button that appears to log into the data source itself (in this example, into ActiveCampaign).
9- For this you will need to enter your Find My Insight username and Master Token for the Connector you have selected (in this example, it will be the ActiveCampaign user with access to the Active Campaign account you need for the report). You can get that from here
https://member.findmyinsight.biz/myconnectors
Your username is the email address you used to create your membership and the Master token for the Connector.
Note- for some data sources, it will use your browser cookies for that source to log the user in automatically
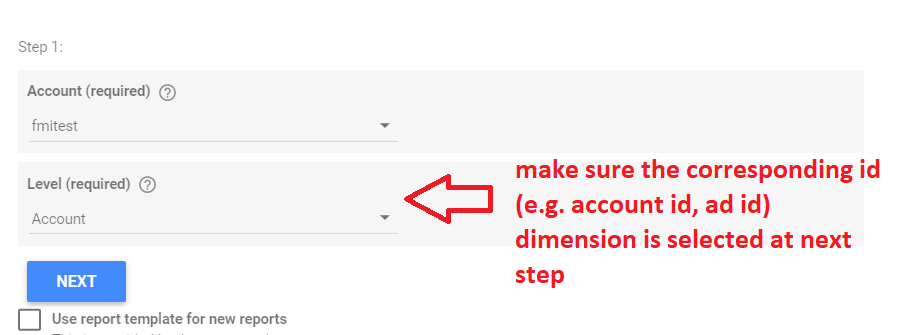
10- Once the login is completed, it will return to the data source setup page. This is what Facebook Ads Insight looks like, other data sources may look different: Select your endpoint and click
11- Update the data source name to something memorable or informative about what you are connecting to (by default, it will be the name of the data source, so in this example it would be saved as "Facebook Ads Insight " if you did not change the name).
Step 2:

Step 3:
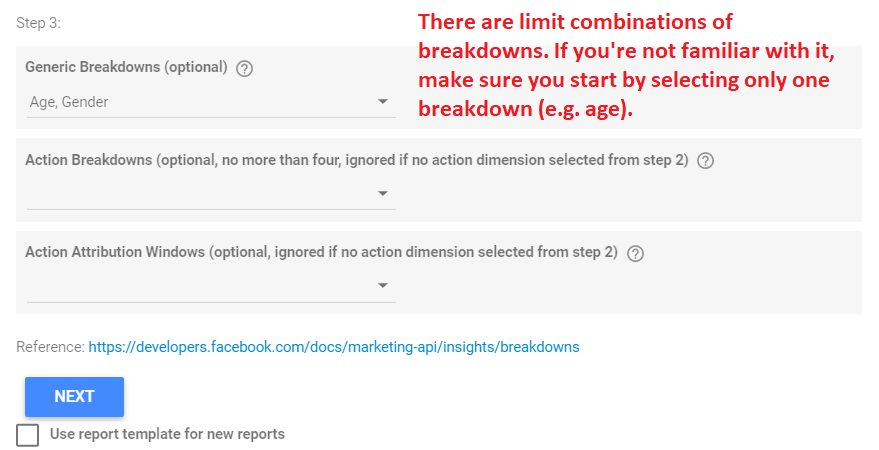
Step 3-1:

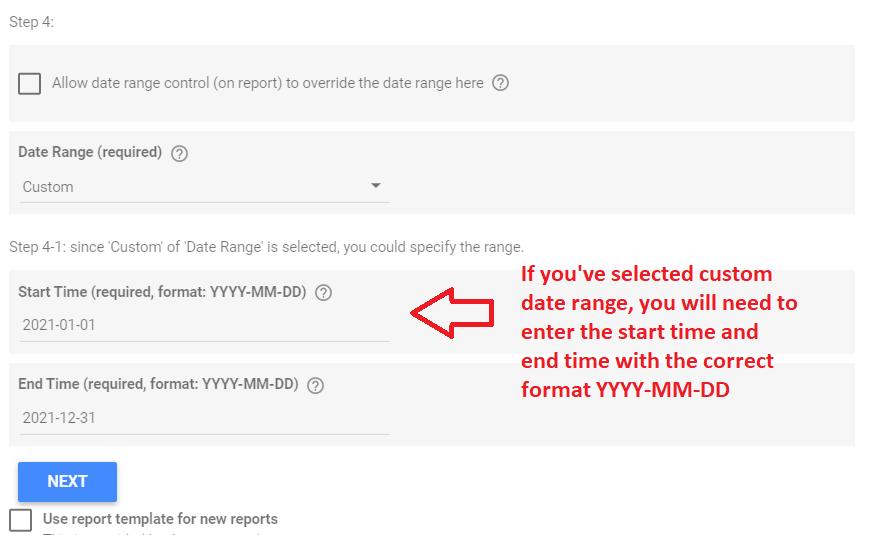
Step 4:

Step 4-1:
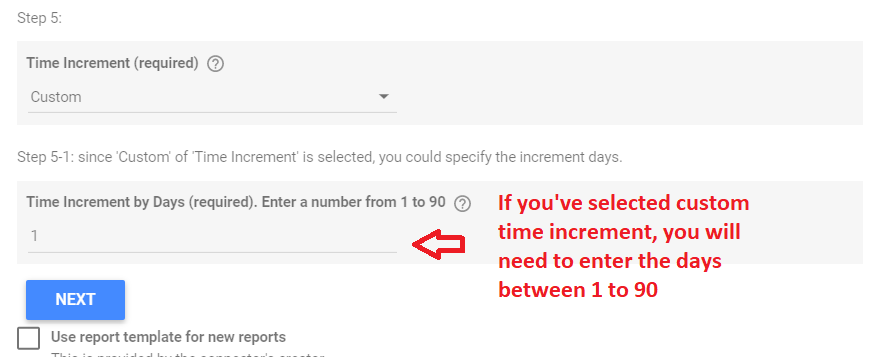
Step 5:

Step 5-1:
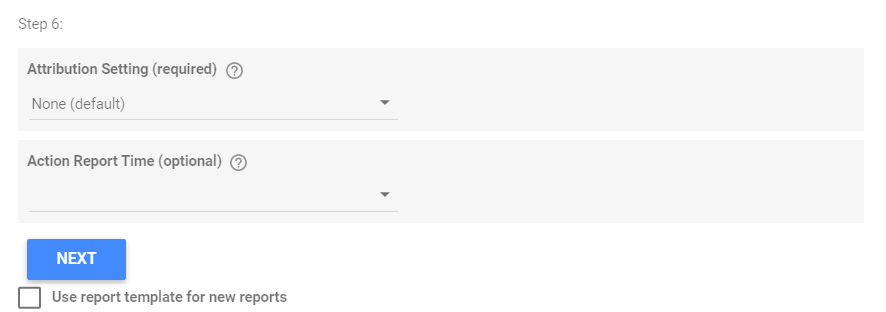
Step 6:
In addition, there are some helpful videos you can watch on our YouTube channel
-If you see this error "This action is not supported when you are signed in to multiple accounts..." (may be localized to your language), see this guide: This Action is Not Supported When You Are Logged in to Multiple Accounts
-If you get errors for no accounts or lack of access, you may need to check with your data source administrator as the user account you are logging in with may not have permissions to access.
Related Articles
ActiveCampaign: Creating your first Looker Studio data source to build your custom Dashboard
Build Your Report Adding and authorising Find My Insight ActiveCampaign Connector in Google Data Studio. This guide shows you how to use a Find My Insight Connector for Data Studio, It's pretty simple, just add and then authorize the connector. This ...Meta Ads: 6 easy steps to build your Looker data source
The Meta Ads data connector for Looker Studio has been build with a 6 step data configurator. The Meta Ads insight API has a lot of un-documented rules around the configuration of your request. Our 6 step configurator compiles at each step to ensure ...Meta Ads: Creating your Connector Membership
Become a Member and purchase your Find My Insight Connectors Thanks for choosing a Find My insight Connector. First things first, you will need to sign up to our portal and become a member. Membership is free. Our privacy Policy can be found here and ...Looker Studio: Speed up your dashboards
Have you been in meeting or presentation and wanted to be able to share insight on Looker Studio but were hesitant because you never know how long you will be waiting your dashboard to render? If the answer to to that question is yes. Have you tried ...Looker Studio: Creating a date dimension from a datetimestamp
Often when building a dashboard you will want to group activities (metrics) by a datetime dimension. This could be day, week, month, year etc. Looker studio lets you select any of those attributes once you have dragged this into the chart. However, ...